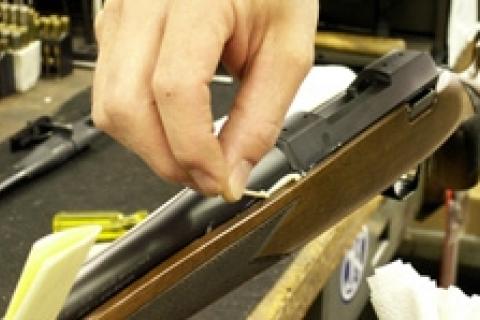
Glass bedding a rifle conjures up all kinds of images — from slapping thick peanut-butter-like glue into a stock to dabbing a bit of glass to reinforce the recoil lug area. Which is correct? That depends on what you are trying to achieve.
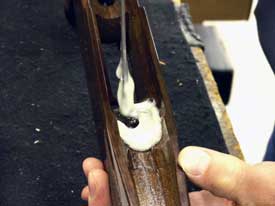
better to have too much than too little.
Glass bedding serves many purposes; in wood stocks it acts as a sealer to exposed wood, but the primary function in both wood and synthetic stocks is to give the action full contact with the stock, preventing it from moving inside the stock — a certain accuracy wrecker.
Bedding hundreds of rifles annually, it has become nearly second nature to me, but even if you have never bedded a rifle, a little common sense and the ability to follow a few simple instructions are all that is needed to achieve professional results.
Rule No.1: Glass Bedding a Rifle
Glass bedding does not, nor should it be, a replacement or fix for shoddy inletting. A poor inletting job is a poor inletting job with glass bedding put on top of it. Glass should be a thin coating of epoxy, not an epoxy stock.
Since the majority of the stock jobs I see are factory replacements, I make every attempt to match the glass bedding of the manufacturer. The mark of excellence is not to be able to distinguish my work from a factory bedding job. I would ask the same from any gunsmith bedding kit or do-it-yourself performing a standard glass-bedding job.
Does the Gun Barreled Action Fit?
Modern actions come in many lengths: super short, short, standard and in some cases magnum length receivers. After obtaining the stock, ensure the proper stock has been received before applying bedding compound. A dry fit is the best method to determine the fit with all of the parts intact; which eliminates any surprises after the glass is in place.
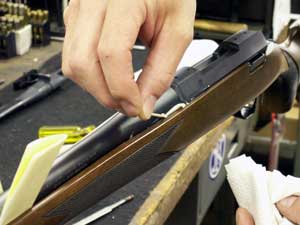
alleviate headaches; a chisel may be needed to
remove hardened glass.
If the gun barreled action does not fit easily, do not force it. There may be many reasons it doesn't fit. Even though the action length is the same, a magnum barrel is usually larger in diameter than a standard rifle barrel. Do not start hacking away on the stock. Contact the manufacturer and double check that the correct part has been received. Exchanges can usually be made as long as the stock has not been damaged or altered.
Let's say the planets are in perfect alignment and things are going smoothly. While dry fitting, all components should be in place — gun trigger, magazine box, bolt release and even the bolt should be put in place.
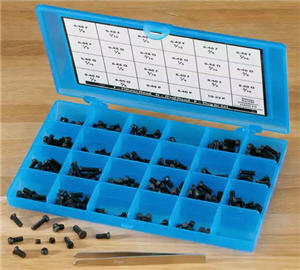
Tip: You'll have no worries about lost screws when you work on your gun if you own the Pachmayr Gun Screw Set. It's a 277-piece set that includes a dozen each of 23 screws that fit common applications in many firearms.
While the bolt is in place, I load dummy shells into the magazine to ensure the action feeds properly. If it doesn't feed properly while dry fitting, adding bedding compound will only magnify the problem.
If everything fits, disassemble the small parts from the receiver. A trick I use when disassembling a firearm I'm not familiar with is to take a photo with my camera so I remember where everything goes and am able to recall the photo for reference when reassembling the rifle.
For glass bedding, the only parts needed are the action, action screws and the floor plate assembly. The small parts like the magazine box and trigger should either be removed or if some doubt exists how to reassemble, fill the areas in question, with clay.
As the rifle is disassembled, examine the existing bedding job. This not only serves as a guideline of how the stock is bedded, but shows whether the stock and its bedding have stood up to the recoil of repeated firings. If it is in good condition, the same method of glass bedding can be used. However, if the bedding has failed (cracked, broken or softened due to exposure from harsh petroleum-based gun cleaning agents) alternative bedding methods should be investigated.
Preparation for the Gun Bedding Compound is Key
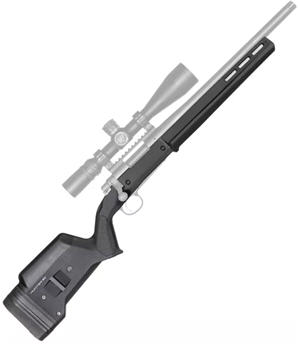
Short Action
The bedding compound will flow into every nook and cranny on the action and if it gets into a place you don't want it, Hulk Hogan won't be able to get the action out, short of breaking the stock. This is known as mechanical lock. Take my word for it; the action can be a bear to remove, often damaging the gun stock, the receiver or both.
To prevent the bedding compound from entering these nooks and crannies, place clay into the voids. I like children's clay for its easy cleanup.
Next, degrease the action and place two thicknesses of common masking tape on the front and the sides of the recoil lug. The tape creates a small gap around the recoil lug allowing the barreled action to be released from the stock more easily.
The Most Important Step: Your Best Friend While Glass Bedding a Rifle
Release agent will become your best friend while glass bedding a rifle. Many of the manufacturers that sell bedding compound sell release agents; however, I prefer Johnson's paste wax for ease of use and control with little residue left behind after the job is completed. To apply, place a liberal amount on your fingers, and then spread and thin the wax on the action and barrel. If in doubt, apply wax.
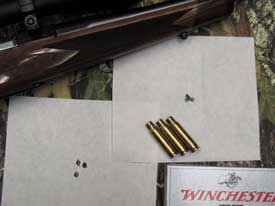
glass bedding that had failed causing erratic
groups; the upper target shows the proof of a
properly bedded rifle.
Don't forget the action screws, floor plate and any parts that will be installed into the stock while the compound is curing.
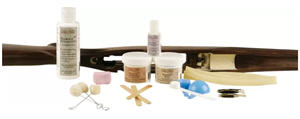
The bedding compound is usually a two-part epoxy with two equal parts mixed together. I use craft sticks or Popsicle sticks to mix the bedding and apply it to the stock. I prefer a gel-type bedding compound because it is less messy and when properly mixed it has the consistency of peanut butter.
In a disposable plastic cup, not waxed (wax can prevent the bedding compound from properly curing), mix the glass exactly as the instructions recommend. If the instructions call for four minutes of mixing time, do so, improperly cured glass will have to be dug out of the stock and re-bedded.
Another tip, I have found that works well is the use of disposable rubber gloves. The bedding compound is stickier than honey and even with soap and water it is difficult to get off your hands.
Many gunsmiths tape paper towels to the stocks to aid in cleanup, but I have found it unnecessary if care is taken when applying the compound. I do, however, apply a thin layer of wax on the outside of the stock in the vicinity of where I have put the glass to aid with cleanup.
Most fiberglass and wooden stocks require little preparation other than scraping any paint or built-up finish from the inletting to allow the bedding compound to adhere to the stock. However, the plastic stocks that are so popular today need to be roughed up to give the bedding compound something to adhere to as the bedding does not stick well to plastic stocks. I often drill small holes that angle away from the action to allow the compound to get into the holes and keep the compound in place.
Putting the Bedding Compound Into the Recoil Lug Area
If no recesses are to be filled other than the recoil lug area, begin by putting some compound approximately half the size of a dime into the recoil lug area, but only toward the rear of the cutout. While you can certainly fill the recoil lug area full of the compound, it serves no purpose other than to waste bedding compound and add weight to the stock. Place the bedding compound to imitate where the manufacturer has placed the compound.
Free Floating the Rifle Barrel
Most shooters and hunters know all about free floating barrels, but there are differences of opinions as to where the free float should begin. Some gunsmiths bed only the action, allowing the barrel to float full length, while others will glass the action and the front cylinder of the barrel and allow the remaining barrel to free float. Much of this is personal preference and what the gunsmith or shooter has deemed the most accurate from their own experience. I've seen both perform well.
Most rifles only need bedding compound in the recoil lug areas and the rear screw area. However, the barrel needs to be supported while the bedding compound cures to allow the barrel to free float. I use a spacer made of thin cardboard about .032 of an inch to allow proper clearance. Where the space is placed depends on the gunsmith doing the work and the firearm being bedded.
Many gunsmiths place the spacer at the fore-end tip; others place the shim at the cylinder section of the barrel. After this shim is in place, the action screws are tightened. I prefer to tighten the rear screw first and then snug up the front screw. Avoid the use of a torque wrench to bed the rifle. If the action utilizes three screws, the screw directly behind the magazine should be tightened enough so that the parts don't rattle.
Tip: Pachmayr Gun Screw Set is a 277-piece set that includes a dozen each of 23 screws that fit common applications in many firearms.
Cleanup & Reassembly of Your Rifle
After the bedding compound has cured, the rifle is ready for disassembly and final cleanup.

Remove the action screws, a quick rap with a plastic or leather hammer on the handle of the screwdriver will help persuade stubborn screws. The same mallet will help break the barreled action if the front of the action doesn't release easily from the bedding compound.
Tip: The RangeMaxx Magnetic Gun Cleaning Mat allows you to disassemble your firearm for a thorough cleaning without worrying about losing small springs or screws.
A 5/8 inch dowel installed in the back of the receiver provides an additional handle while distributing even pressure on the barreled action when removing it. The barreled action will "pop," making it sound as though something has broken before it finally decides to free itself. However, the fresh bedding compound will be an exact copy of the receiver.
If the action screw holes in the stock have some runoff of bedding compound, be sure to relieve the holes with a round file or appropriate size drill bit. Most screws are 1/4 inch. A 5/16 drill bit should allow plenty of clearance for the screws.
Clean out any remnants of clay from the recesses of the rifle. Reassemble the small parts using the photo you took earlier if needed, then tighten the screws. You may torque the screws now if you wish. Test the feeding of the rifle with dummy rounds.
If all checks out, the rifle is ready for the field.
Bedding a rifle is not particularly difficult, but does require a little planning and some attention to detail. However, the results from a properly bedded rifle are worth the effort.
- 84640 views

